Cleaning your home may seem overwhelming, but breaking it down into manageable steps can make the process smoother and more efficient. In this guide, we’ll walk through the typical house cleaning process step by step, ensuring you have a clean and cozy living space in no time.
Step 1: Gather Your Supplies
Before you start cleaning, gather all necessary supplies such as cleaning solutions, cloths, brooms, and vacuum cleaners. This will save you time and keep you organized.
It’s also helpful to keep a checklist of all your supplies. This way, you can ensure that you have everything you need at hand. Don’t forget the little things like trash bags and sponges! Having these supplies ready can make the entire house cleaning process feel much less daunting.
Organizing your cleaning supplies in a caddy or a designated space can streamline your efforts. When you’re not scrambling to find what you need, you can focus more on cleaning and less on searching. A well-prepared start sets the tone for an efficient cleaning session!
Step 2: Declutter Each Room
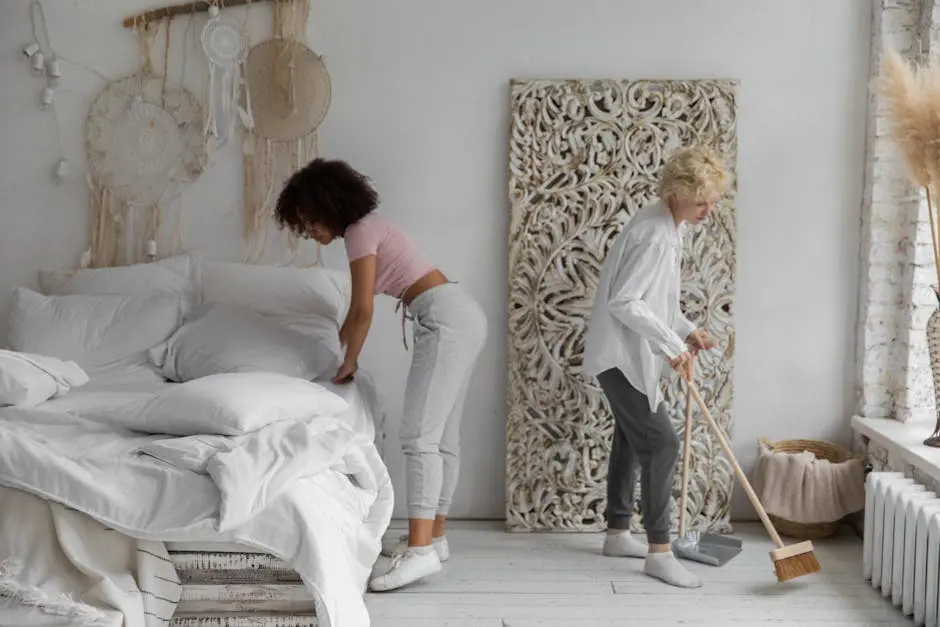
Go through each room and pick up items that don’t belong. This makes the actual cleaning process much easier and more effective.
Decluttering doesn’t have to be a huge task. Start with one area or room and work your way through. You might be surprised at how much you can remove in just a short time!
As you declutter, make quick decisions about what to keep, donate, or throw away. It’s amazing how freeing it can be to let go of items that no longer serve you. A clutter-free space lets the cleaning process shine, allowing your home’s beauty to come through!
Consider setting up a ‘stay’ and ‘go’ box. Everything that goes into the ‘go’ box can be dealt with later, while the ‘stay’ box should just hold the items that genuinely belong in the room.
Step 3: Dust and Wipe Surfaces
Start from the top and work your way down. Dust high surfaces like shelves and furniture, then wipe down tables, countertops, and other surfaces with appropriate cleaners.
Don’t forget about less obvious spots, like window sills and light fixtures! Cobwebs often hide in corners and high places, so take a moment to address those as well. A careful dusting can make a world of difference.
Use a microfiber cloth, which attracts dust efficiently while being gentle on surfaces. This can help preserve the quality of your furniture! The key to effective dusting lies in the technique: always dust from top to bottom.
If you have sensitive surfaces, be sure to choose cleaners suitable for those materials. It’s all about taking care of your home—the right products can enhance the look and longevity of your furniture and fixtures.
Step 4: Clean the Floors
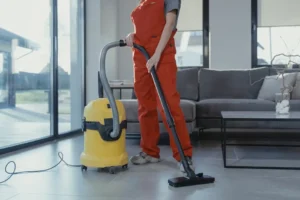
Vacuum carpets and rugs, and sweep and mop hard floors to remove dirt and debris. Pay special attention to corners and under furniture.
Consider investing in a good vacuum cleaner that suits your needs—some are designed specifically for pet hair, while others excel at handling various surfaces. If you’re dealing with hard floors, a microfiber mop can work wonders!
Remember to change or clean your vacuum filters regularly. A well-maintained vacuum maintains suction and ensures that even the tiniest particles are captured. Plus, it’s always nice to know that you’re cleaning with a device that’s in tip-top shape.
Floor cleaning can be made even more fun if you put on your favorite playlist. Cleaning will feel less like a chore and more like a personal dance party as you move around your space!
Step 5: Tackle Restrooms and Kitchens
Give extra care to kitchens and bathrooms, as they require specific cleaning products. Ensure fixtures, countertops, and appliances are cleaned thoroughly.
Start with the sink and work your way to surfaces in these areas. Don’t shy away from scrubbing those stubborn stains—sometimes, it just takes a little elbow grease to bring back that shine.
Remember to pay attention to often-neglected spots, like behind the toilet and under the sink. These areas can gather dust and grime over time and benefit from regular cleaning.
Also, ensure your kitchen appliances are maintained. A sparkling stove or a spotless refrigerator can elevate the entire space and make your kitchen feel welcoming and clean.
Step 6: Finishing Touches
Finally, replace any items you’ve removed, fluff pillows, and take a moment to appreciate the clean space you’ve created!
Add your personal touch back into the cleaned areas. Perhaps some fresh flowers or a cozy blanket can enhance the comfort of your living space.
Take a step back and enjoy the fruits of your labor. That fresh, clean smell and the sight of a tidy room can be incredibly gratifying. If only for a moment, it’s a good feeling to enjoy the serenity of a well-kept home.
Consider scheduling regular cleanings, so your home stays in that delightful condition for longer! And the best part? It becomes quicker each time, as you maintain the space you’ve worked hard to create.
Wrapping Up Your Cleaning Journey
By following these steps, house cleaning becomes a more manageable task. Regularly maintaining your space will not only enhance its appearance but also contribute to a healthier living environment. So roll up your sleeves and enjoy the satisfaction of a clean home!